Getting Ready, Slowly
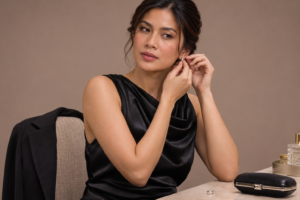
A getting-ready video captures the anticipation of an evening
before you step outside. An earring fastened, a jacket lifted
from a chair, a final glance in the mirror: each small action
contributes to the mood. Together, these details turn an
everyday routine into a personal style story.
There is no need to document every step. Instead, choose a
few familiar gestures that take the viewer from the first
accessories to the finished outfit. Above all, leave enough
time to enjoy preparing so the camera follows your routine
without taking it over.
Start Your Getting-Ready Video with a Simple Story
First, consider where the sequence begins and ends. You might
open with a dress hanging beside a jacket, move through the
finishing touches, and close with a full-length view before
leaving. This simple structure gives the video direction
while allowing spontaneous moments to find their place.
Next, choose three to five actions you want to capture.
For example, you could film yourself selecting earrings,
adjusting a sleeve, and picking up your bag. A short list
keeps filming manageable, especially when you have limited
time before heading out.
Create a Clean Setting for the Details
Select a corner where the outfit can stand out. A plain wall,
a tidy dressing table, or a simple mirror provides enough
context. Before recording, move distracting objects out of
the frame while keeping the space recognisable as somewhere
you would actually prepare.
Check reflections as well. Mirrors can reveal objects,
people, or parts of the room outside your immediate view.
Sometimes, a small change in camera position gives you a
cleaner composition without rearranging the whole space.
For an even finish, use soft, diffused light and avoid strong
beams across the background. Then record a brief test to see
how the light falls on your face and clothing. If satin or
jewellery catches too much glare, adjust the light or your
position slightly before continuing.
Bring Variety to Your Getting-Ready Video
Let each shot reveal something different. For instance, a
close view can capture a bracelet being fastened or the
texture of a bag. A medium shot can then show you slipping
on a jacket, while a wider frame reveals the outfit’s shape.
Keep the camera steady on a secure support. Begin recording
just before the action and continue briefly after it ends.
This way, you have room to trim each clip without cutting
off a gesture.
Film small actions as you would normally perform them.
A sleeve adjusted once or a relaxed glance at the mirror
may already give you enough material. Before repeating
anything, watch the clip to see whether it has the ease
you want.
Edit for Rhythm and Continuity
Arrange the clips in an order that feels easy to follow.
For example, reaching for a jacket can lead into putting
it on. Similarly, a close view of a bag can introduce a
wider shot of carrying it towards the door.
Next, remove repeated actions and give the strongest moments
enough time to register. A quick detail shot may need only
a brief appearance, whereas the completed outfit benefits
from a longer view. Simple cuts can connect these moments
while keeping attention on the clothes and movement.
For more guidance on planning your footage, read
Adobe’s guide to creating a shot list
.
Use it to organise the shots you want to capture, then
adapt the sequence to your own routine.
Give the Finished Outfit Room to Move
Finally, end your getting-ready video with a clear view
of the complete look. Take a few steps, turn slightly,
or pick up your bag so the viewer can see how the fabric
falls and how the pieces work together.
The final moment does not have to be a formal pose.
Instead, a smile at the mirror or a jacket thrown over
one shoulder can bring the sequence to a natural close.
Once you have it, put the camera away and leave yourself
time to enjoy the evening.